The EasyVend online orders portal allows you to place your orders via your vendor's website. Depending on your vendor's setup, you may also be able to securely make payments for invoices and orders.
Getting Started
When your vendor invites you online, or when you register via their website, you will receive an email inviting you to set your login password.
Activating your Account
- Click on the link provided in the invitation email.
- Enter your password.
Password Requirements: Must be 8–50 characters and include uppercase letters, lowercase letters, numbers, and special characters.
- Confirm your password by entering it a second time.
- Click Submit.
- Log in using your User ID (email address) and your newly created password.
Multiple Delivery Sites: If your vendor delivers to multiple locations for your business, each site is treated as a separate customer profile in the vendor's software. Use the exact same email address for each registration by asking your Distributor to create accounts per sublocations using the same exact email address.
Once the invitations are received, logging in will allow you to manage and add orders for all associated sites.
Device Compatibility: You can log into the portal from a desktop or mobile device. Both views are functionally identical; use whichever is most convenient.
First Login: When you log in for the first time, you will be taken directly to the Account screen to verify your details.
Resetting Your Password
If you forget your password and cannot log in:
-
On the login screen, click Forgot Your Password?
-
Enter your registered email address.
-
Check the "I'm not a robot" box.
-
Click Submit. An email will be sent to you with a password reset link.
Note: If you are already logged in and simply want to update your password, use the Password option in the main menu.
Changing Your Email Address
Confirmation emails for orders and payments are automatically sent to your login email address. To change this address:
1. Contact your vendor and request a new portal invitation sent to your new email address.
2. Click the link in the new email to set up your password.
3. Log in with your new credentials. Your existing history and data will remain fully linked and available.
The Main Menu
Use the main menu to navigate between different screens within the order portal.
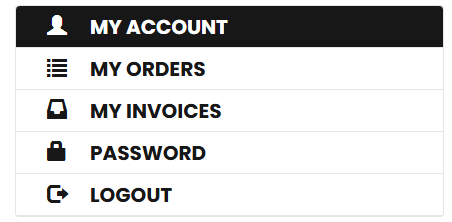
Desktop View - The menu is displayed on the left side of the webpage:
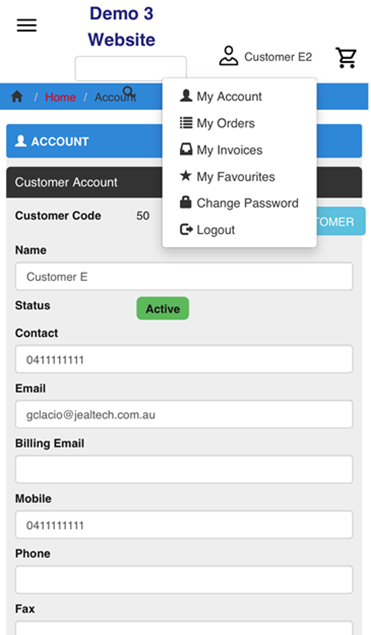
Mobile View - Tap the Profile Menu (person icon) on the top right of the screen to open the sidebar:
Menu Options Breakdown:
Account: View your login and primary customer details.
Orders: View a list of placed orders, view order summaries, cancel upcoming orders, copy old orders, or complete pending payments.
Invoices: View your invoice history, print invoice copies, or make secure payments.
Password: Update your portal password.
Switch Account (Mobile View only): Seamlessly transition between multiple vendor accounts or locations without logging out. This option enables you to switch between multiple accounts with an EasyVend vendor and/or accounts with multiple EasyVend vendors, without having to log out and log back in again.
Log Out: Securely sign out of your account and return to the login screen.
Building Your Cart
The Products screen gives you a complete view of your vendor’s catalog.
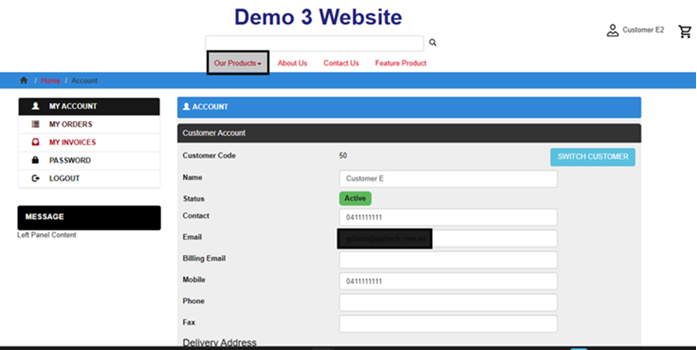
Add Items: Locate the items you need, enter your required amount in the QTY field, and click the Add to Cart button.
Reviewing Your Selection: At any stage before checkout, click the Cart icon (top right corner) to view your selected items, adjust quantities, or remove products.
Order Checkout Process
Once you are ready to complete your order, click the Check Out button in your cart and follow these steps:
-
Verify Customer & Delivery Address
1. Check that your name and delivery details are correct.
2. Change Customer: If you manage multiple sites under one login, click this option to open a dropdown menu and select the correct delivery location for this specific order.
-
Select a Delivery Date
Choose your preferred delivery date from the calendar.
Why is a date greyed out / unavailable?
- The order cut-off time for that date has already passed.
- The vendor does not deliver on that specific day of the week.
- The vendor has recorded your business as closed/on holiday for that date.Note on Public Holidays: If a holiday disrupts normal delivery, your vendor may set up an alternate "supplement" delivery date; in this case, you will be able to place an order for the alternate delivery date, even if you do not usually receive deliveries on that day.
Note on Missing Date Selectors: If you are not prompted to select a delivery date at all, your vendor has disabled this feature online and they will be the one to review and schedule your order for delivery. -
Add PO Reference & Instructions
1. PO Reference: Enter an optional purchase order reference number (maximum 30 characters). If your vendor has assigned a default PO number, it will be pre-filled.
2. Delivery Instructions: Add any specific notes for the delivery driver in the provided text field.
-
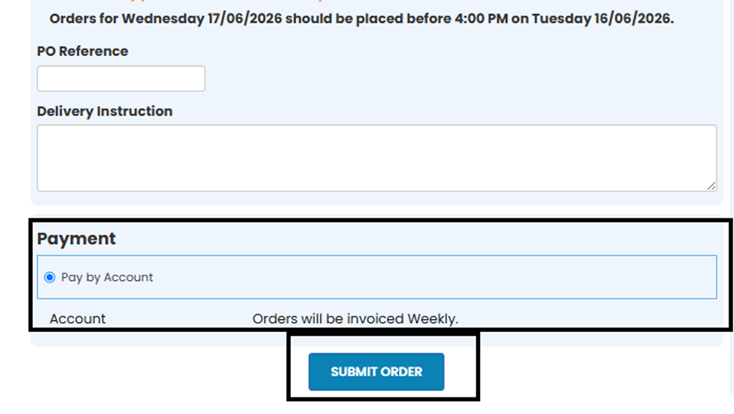
Select Payment & Submit
Choose your payment method (e.g., Pay by Account or Credit Card).
1. Account Payments: Select Pay by Account and click Submit Order.
2. Credit Card Payments: If your vendor has online credit card processing enabled, enter your card details on screen and click Submit.
3. Order Confirmation: Once successfully submitted, a confirmation screen will appear and an order receipt will be emailed to you immediately.
The Products List
Products are systematically sorted with your Favourites displayed at the very top, followed by general products organized into vendor-defined categories.
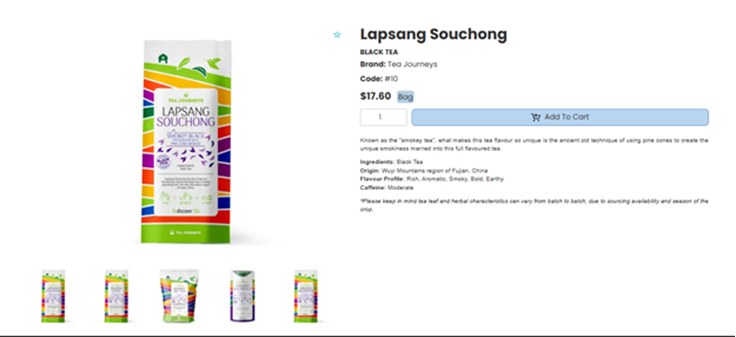
Product Photos: Click on any product image to open an expanded pop-up window to view a larger image and read comprehensive product descriptions.
Search Feature: Enter a partial description or specific product name in the search box and click the search icon. To clear search filters, tap the X icon inside the search bar.
Product Categories: Filter down your list by ticking the checkbox to the right of each category name to show or hide items.
Using Favourites
The Favourites feature provides rapid access to your most frequently ordered items.
-
Vendor Setup: If you receive a standard baseline order, your vendor may have already pre-populated this list for you. If they haven't, you can request that they upload your standard baseline order directly into your Favourites list.
-
How to Add: Search for a product and tap the star icon in the top-right corner of the product image. The star will fill with color to confirm it has been saved.
-
How to Remove: Tap the colored star icon on any product to remove it from your list; the star’s color will be removed, indicating the product has been removed.
Existing Orders
The Existing Orders menu allows you to view past transactions, track active order statuses, or filter history by specific date ranges and account sites.
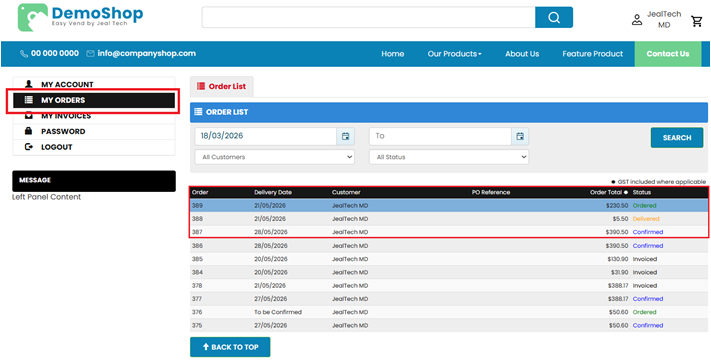
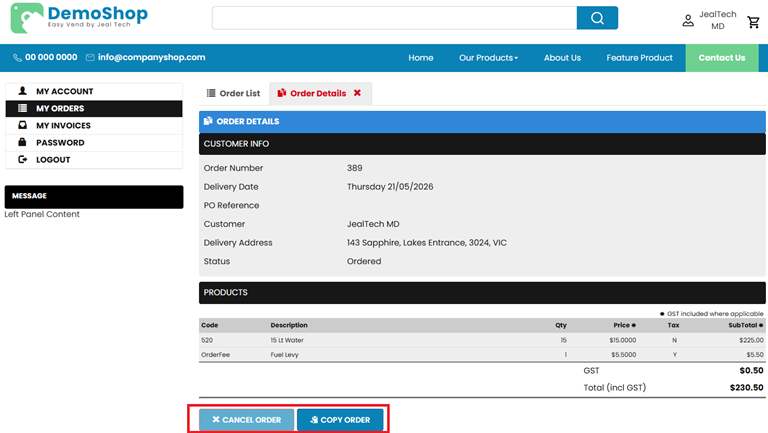
Clicking an individual order number brings up its summary and reveals the following management tools:
-
Cancel Order: Cancel an upcoming delivery entirely. This option remains available as long as the order has not been confirmed, delivered, invoiced, or passed its cutoff time.
-
Copy Order: Instantly duplicate a past order. This action copies all items and their quantities back into your cart for quick re-ordering. You can change delivery locations or adjust item amounts before submitting.
Invoices
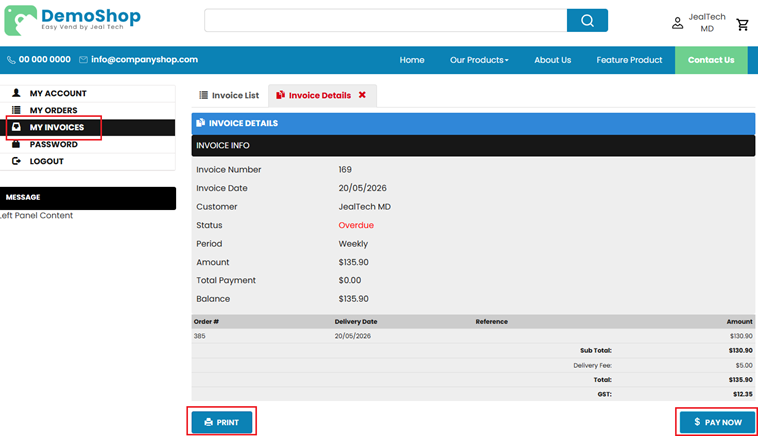
The Invoices menu displays a list of your statements, outstanding balances, and payment histories.
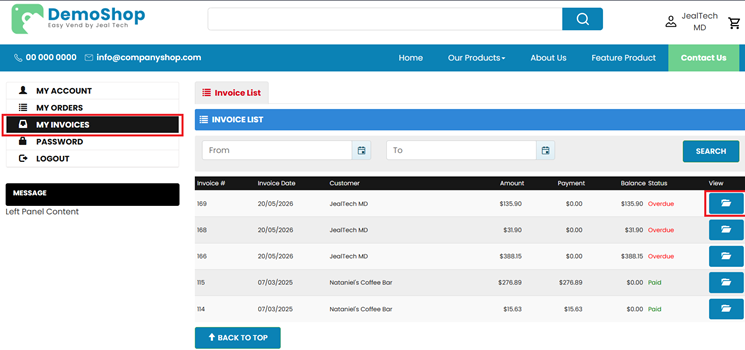
Viewing Invoice Details
1. Filter by date range using the From and To fields and click Search.
2. Open the invoice details, click the blue folder icon () to the right of the invoice
Invoice Management Actions
Print: Download the invoice as a clean PDF file for local viewing, filing, or printing.
Pay Now: Clear outstanding invoices instantly via credit or debit card if your vendor has enabled online payments.
Payment Completion: Once your invoice is successfully processed, it will be marked as Paid across your portal. A confirmation email with an attached copy of your paid invoice receipt will be sent automatically.
Account
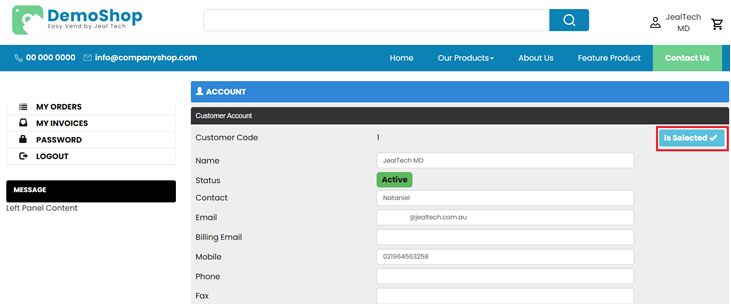
The Account screen shows an overview of your login registration profile and lists all associated customer accounts linked to your identity.
To start a brand new order from this screen, go to Products menu and build your cart.
Password
To safely change your portal login password at any time:
1. Navigate to the Password menu option.
2. Enter your current password.
3. Type in your new password.
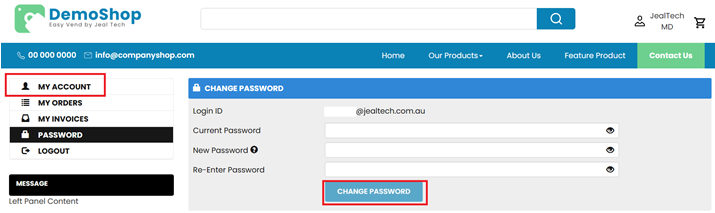
Passwords must be 8–50 characters long and contain a mix of uppercase letters, lowercase letters, numbers, and special characters.
Switch Account
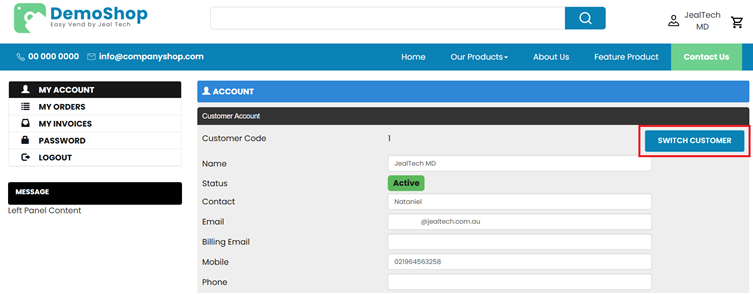
If you manage businesses across multiple EasyVend vendors or oversee various shipping branches, the Switch Account option allows you to move freely between dashboards without needing to log out and log back in.
To Switch Accounts:
1. Select My Account from the main menu.
2. From the list of accounts you have added, tap the account you wish to switch to.
Logout
- Online Order Portal (Desktop View): Click Logout when finished. To protect account security, you will be automatically logged out after a period of prolonged inactivity.
- Mobile View: If you do not log out of the mobile view, it will remember you next time you open it.
Adding an E-Commerce Website to a Mobile Home Screen
The E-Commerce Website is mobile-friendly and can be added to the Home Screen of an iPhone or Android device. This creates a shortcut so customers can open the ordering website with one tap, similar to using an app.
iPhone – Safari
-
Open the E-Commerce Website in Safari.
-
Tap the three-dot menu at the bottom of the screen.
-
Tap Share.
-
If required, tap View More to display the full list of options.
-
Tap Add to Home Screen.
-
Check the shortcut name and update it if required.
-
Leave Open as Web App enabled.
-
Tap Add.
The website icon will be added to the customer’s Home Screen. Tap the icon to open the E-Commerce Website.
Android – Chrome
-
Open the E-Commerce Website in Chrome.
-
Tap the three-dot menu in the top-right corner.
-
Tap Install and create shortcut.
Depending on the Android device or Chrome version, this option may appear as Add to Home screen.
-
Check the shortcut name and update it if required.
-
Tap Add to confirm.
The website shortcut will be added to the customer’s Home Screen. Tap the icon to open the E-Commerce Website.