Overview
MiniVend Web is used by delivery drivers to manage daily customer deliveries from a phone, tablet or other supported device. Delivery runs are created in EasyVend and then loaded into MiniVend Web. Once a delivery run has been loaded, the driver can view scheduled orders, search for customers, update delivered quantities, add products, record notes, capture proof of delivery, print dockets, invoice orders where applicable, and release the completed run back to EasyVend.
Daily Workflow - MiniVend Web is generally used in this order:
1. Log in to MiniVend Web
2. Load the assigned delivery run
3. Open the Delivery List
4. Select each customer delivery
5. Update quantities, notes, photos or signatures as required
6. Complete the delivery
7. Review completed orders if needed
8. Release the delivery run back to EasyVend when all deliveries are finished
Before You Start
Before a driver can use MiniVend Web, the office should check that the required setup has been completed in EasyVend.
• The delivery run has been created in EasyVend for the correct delivery date.
• The truck and round details are correct.
• The user has been assigned to the delivery run.
• MiniVend Web access has been enabled for the user.
• The device has an active internet connection.
• The user has valid login details.
• Camera permission is allowed on the device if delivery photos will be used.
• Printing access has been set up if delivery dockets will be printed from the device.
Access and Login
|
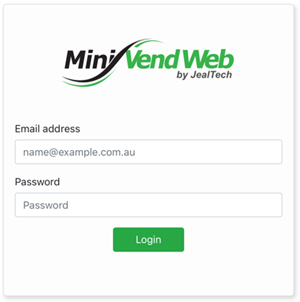
MiniVend Web can be downloaded from the App Store or Google Play where available. Your office or JealTech will provide the correct access details for your device. 1. Open MiniVend Web on your device. If you cannot log in, check that your login details are correct, your device has an internet connection, and MiniVend Web access has been enabled in EasyVend. |
Screenshot: Log In screen. |
Loading a Delivery Run
|
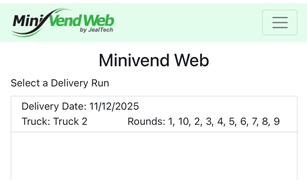
After logging in, MiniVend Web displays the delivery runs assigned to the user. 1. Select the delivery run to be loaded. Note: If no delivery run appears, the run may not have been created in EasyVend, or it may not have been assigned to the logged-in user |
Screenshot: Loading a delivery run. |

Using the Menu
|
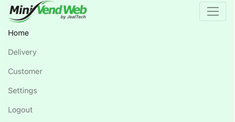
Tap the menu icon in the top right corner to display the MiniVend Web menu. The menu provides access to Home, Delivery, Customer, Settings and Logout. |
Screenshot: MiniVend Web menu. |
Home
The Home screen displays details of the delivery currently loaded in MiniVend Web.
• Vendor Number
• Delivery Date
• Truck
• Rounds
• Total Orders
• Delivered count
When all deliveries for the run are complete, use Release Delivery to release the delivery run back to EasyVend.
Delivery List
The Delivery List is used to view and manage customer deliveries for the loaded run.
The Delivery List includes two tabs:
• Scheduled Orders: Displays orders still to be delivered.
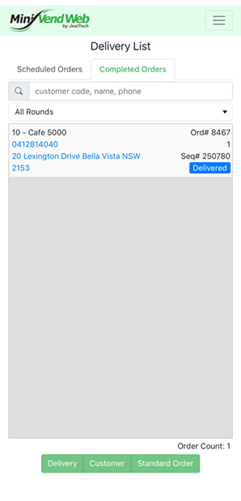
• Completed Orders: Displays orders that have already been completed.
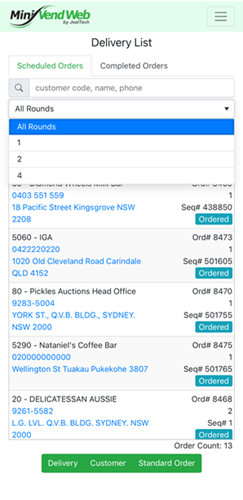
You can search for a customer by entering a customer code, name or phone number in the search field.
If more than one round is loaded, use the Round filter to display orders for a selected round, or select All Rounds to view all orders.
Tap a delivery to open the Delivery Detail screen.
Scheduled Orders
Screenshot: Filtering the Delivery List by round. |
Completed Orders
Screenshot: Completed Orders tab. |
Delivery Detail
The Delivery Detail screen is used to view and update the customer's order.From this screen, you can:
|
• View the customer's phone number and delivery address Tap Save after making changes. |
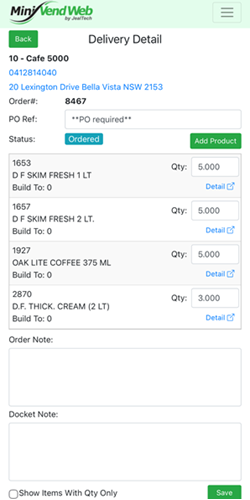 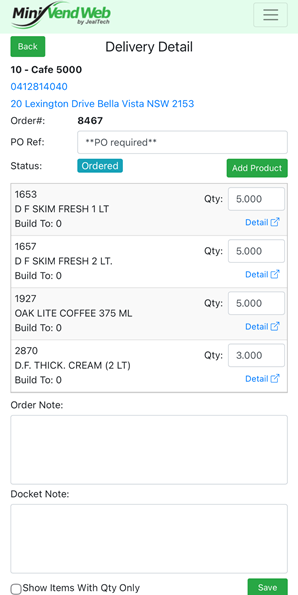 Screenshot: Delivery Detail screen. Screenshot: Delivery Detail screen. |
Note: The buttons available may depend on the status of the order and the permissions set for the user in EasyVend.
Calling Customers and Opening Maps
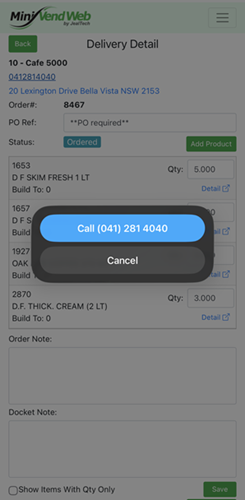
Tap the customer's phone number to call the customer. Tap the delivery address to open the address in the device's map application.
|
Screenshot: Calling the registered customer number. |
Screenshot: Map navigation opened from the delivery address. |
Delivery Items and Returned Containers
Tap Detail next to a product to view the Delivery Item screen.
|
• Product code |
Screenshot: Delivery Item screen with returned container tracking. |
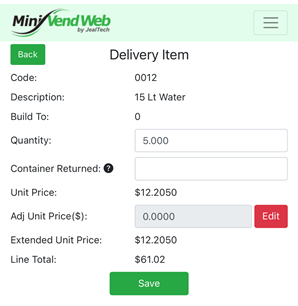
Update the quantity or returned container details as required, then tap Save. If the adjusted unit price is locked, tap Edit if you have permission to change it.
Completing a Delivery
When the order details are correct, use the action buttons at the bottom of the Delivery Detail screen.
Depending on the order status and user permissions, the available options may include:
|
• Cancel Order |
|
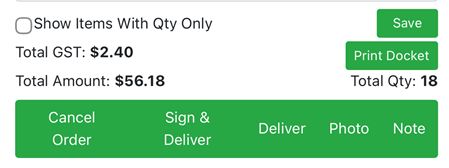 Screenshot: Delivery Detail action buttons.
If proof of delivery is required, use Sign & Deliver or add a delivery photo before completing the delivery.
When an order is completed, it will move from Scheduled Orders to Completed Orders.
Sign and Deliver
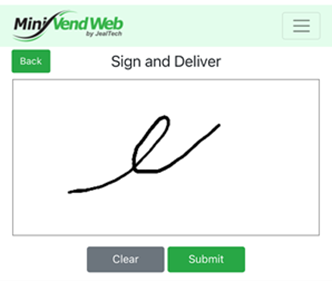
Use Sign & Deliver when a customer signature is required as proof of delivery.
|
1. Open the Delivery Detail screen.
|
Screenshot: Sign and Deliver screen. |
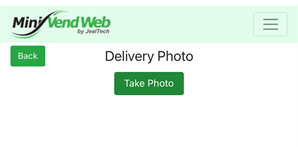
Delivery Photos
MiniVend Web allows drivers to take delivery photos as additional proof of delivery.
| 1. Open the Delivery Detail screen. 2. Tap Photo. 3. Tap Take Photo. 4. Take or upload the photo as prompted by the device. 5. Add or review the delivery note if required. 6. Save the photo.
|
Screenshot: Delivery Photo screen before a photo is taken. |
Run Sheet Notes
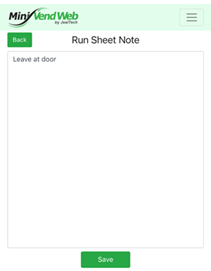
Run Sheet Notes can be viewed and updated from MiniVend Web.
|
1. Open the relevant customer or delivery.
|
Screenshot: Run Sheet Note screen. |
Printing Dockets
From the Delivery Detail screen, tap Print Docket to generate the delivery docket.
The docket opens as a PDF and can be viewed, saved or printed, depending on the device and printer setup.
If remote printing has been configured, dockets can be printed from MiniVend Web without needing to return to the office.
Printer Compatibility
MiniVend Web printing requires a printer that supports Wi-Fi Direct. This allows the phone or tablet to connect directly to the printer without needing a local Wi-Fi network or router.
Before purchasing a printer to use with MiniVend Web, confirm that the model being supplied includes Wi-Fi Direct support. Some printers may list Wi-Fi as optional, so you should check the exact model with your printer supplier.
We recommend testing the printer with MiniVend Web before using it for live deliveries, to confirm that it connects and prints correctly from the device your team will be using.
Invoicing an Order
|
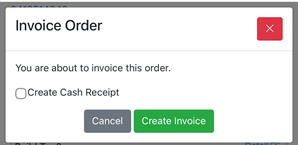
If invoicing is available for the order, tap Invoice. A confirmation window will be displayed before the invoice is created. If a receipt is required, tick Create Cash Receipt before creating the invoice. This will create a cash receipt at the same time as the invoice. Tap Create Invoice to continue, or Cancel to return to the order. |
Screenshot: Invoice Order confirmation window. |
Customer List
The Customer List is used to search for customers and view or update customer details.
- You can search by customer code, name or phone number.
- Use the Round filter to display customers for a selected round, or select All Rounds to view all customers.
- Tick List No Delivery Customer Only to display customers without a current delivery.
- The Customer List displays the customer code and name, phone number, address and last delivery date. Tap a customer to open the Customer Detail screen.
Customer Detail
The Customer Detail screen displays the customer's contact, delivery and billing information.
Depending on permissions, you may be able to update:
|
You can also view customer information such as:
From the Customer Detail screen, you can also use the available action buttons to Add Delivery, view or create an Invoice, add a Payment, view or update the Standard Order, or add and update Notes. Tap Save after making changes. |
Receipts and Allocation
Receipts can be created from the Customer Detail screen when a customer makes a payment.
To create a receipt:
- Open the Customer List.
- Search for and select the customer.
- Tap Payment.
- Tap New Receipt.
- Enter the Reference, if required.
- Select how the payment was made from the Paid By list.
- Enter the Amount received.
- Select the Bank Account.
- Enter the Bank, Branch and Drawer details if required.
- Review the customer’s unpaid invoices.
- Tap Save to create the receipt.
The Unpaid Invoices section displays the following information:
- Invoice number
- Invoice date
- Invoice amount
- Amount already paid
- Remaining balance
Receipt Allocation
Whether the receipt is automatically allocated to the customer’s unpaid invoices depends on the Auto Allocate Receipt setting in EasyVend.
This setting is located under:
Customers > select the customer > Options > Receipt Information
- If Auto Allocate Receipt is selected, receipts created through MiniVend Web will be automatically allocated to the customer’s unpaid invoices.
- If Auto Allocate Receipt is not selected, the receipt will remain unallocated. It can be allocated to the appropriate invoices later in EasyVend.
Note: Receipts created for a specific invoice through the Invoice screen or the customer’s Invoices tab will be allocated to that invoice, regardless of the Auto Allocate Receipt setting.
Holiday Dates
Holiday dates can be entered for customers who will not require deliveries for a period of time.
• Last Delivery Date: The last date the customer should receive a delivery before the break.
• Delivery Resume: The date deliveries should resume.
• Delete Deliveries between the Holiday Dates: Tick this option only if existing deliveries in the holiday period should be removed.
Adding a Delivery
If a customer does not have an existing delivery, or an additional delivery is required, you can add one from the Customer screen.
|
1. Open the Customer List. The new delivery can then be opened and updated from the Delivery Detail screen. |
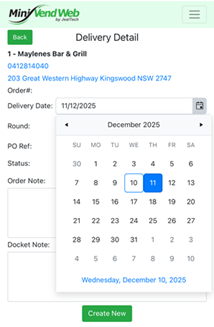
Screenshot: Creating a delivery for another delivery date. |
Changing the Delivery Date or Round
MiniVend Web allows the delivery date or round to be selected when creating a new delivery. If enabled, a delivery can also be moved to another round.
1. Open the delivery.
2. Check the Delivery Date.
3. Select the required Round from the Round drop-down list.
4. Tap Save or Create New, depending on the screen.
Always check the Delivery Date and Round before saving.
Standard Orders
Standard Orders can be viewed and updated from MiniVend Web. The Standard Order List displays the customer's regular products and delivery schedule.
From this screen, you can:
• View the customer's delivery frequency
• View or update usual delivery days
• Add a new standard order item
• Save changes to the customer's standard order schedule
Tap Add New to add a new product to the standard order list.
Tap a usual delivery day to turn that day on or off. Selected delivery days display in green, and days not selected display in red.
Tap Save after changing the delivery frequency or usual delivery days.
Settings and Logout
The Settings option is available from the MiniVend Web menu.
Many settings and permissions are controlled in EasyVend. If an option is not visible, or a button is disabled, check the user's permissions and MiniVend Web setup in EasyVend.
Use Logout from the menu when finished, especially if the device is shared.
Release Delivery
When all deliveries for the loaded run have been completed, return to the Home screen and tap Release Delivery.
Releasing the delivery confirms the run has been completed and releases it back to EasyVend.
Important: 
Do not release the delivery until all required deliveries, notes, photos, signatures and order updates have been completed.